Summary / Overview
The new update of the MSO software contains four enhancements: In future, evaluations can be accessed via a new “Reports” page. This replaces the previous menu item “Reports” in the navigation bar. Status steps can now be processed in parallel. The function can be activated for each event template.In a case example, we show what parallel workflow processing can look like. Furthermore, you can create any number of image fields in the administration area under “Event templates” in the “Activity” tab. In addition, an e-mail distribution list can be defined for each event template for sending e-mails from actions.
Table of contents
1. New display of evaluations
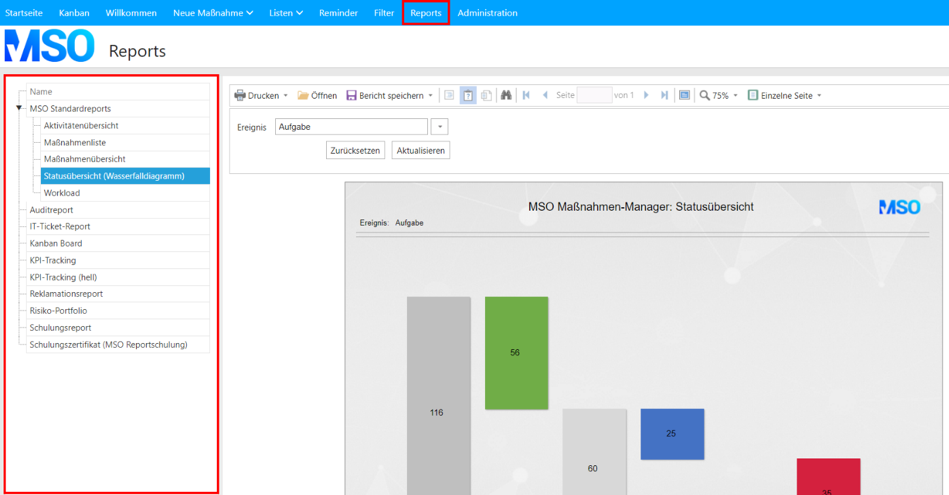
In future, evaluations can be accessed via a new “Reports” page. This replaces the previous menu item “Reports” in the navigation bar. To call up the report page, please click on the “Reports” tab:
Now all reports of your application are listed and can be called up with a click:
Reports grouped in submenus are thereby displayed in a tree structure:
Note: Settings for the submenu can be found in the administration area under “Reports” and “Report definition” (first selection page, at the bottom-> “Name of submenu”).
2. Parallel processing of status steps
2.1 Activating the function
Status steps can now be processed in parallel. The function can be activated for each event template. To use the function, please proceed as follows:
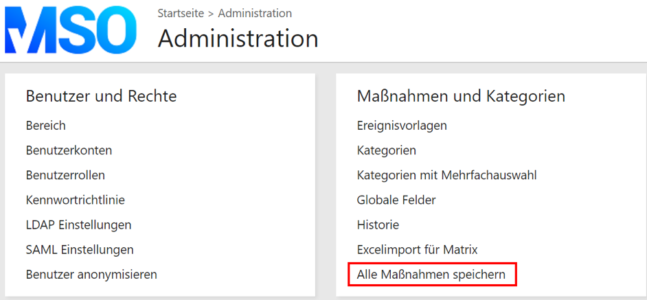
(1) After the new functionality for your MSO-Tool has been activated, all measures of your application must first be saved once. To do this, open the administration area of your application and select the new menu item “Save all actions”:
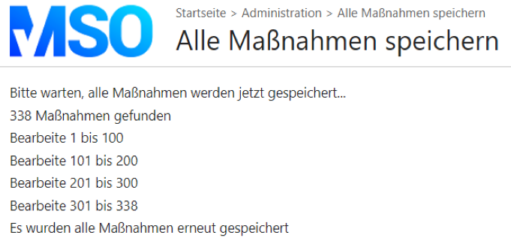
(2) After you have opened the menu item, please click on the button “Save all actions again now”:
(3) Wait until all tasks have been newly saved without errors:
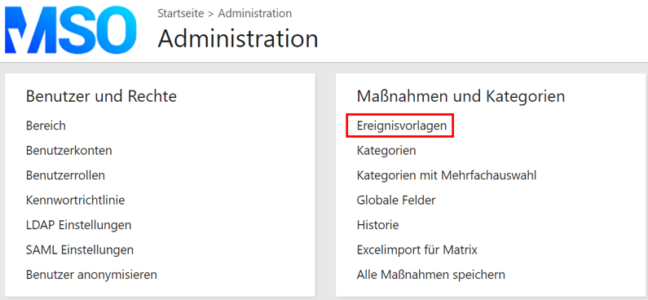
(4) As soon as all actions have been re-saved, you can leave the page again. Now open the administration area and select the menu item “Event templates”:
(5) Open the desired template:
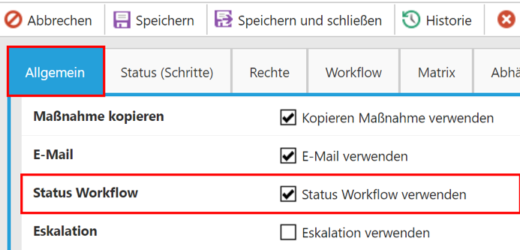
(6) Scroll down in the open menu item “General” and activate the function “Use status workflow”:
(7) Now a new button “Status workflow” appears:
(8) If necessary, open your status steps and check or complete your process steps.
2.2 Case example for parallel workflow processing
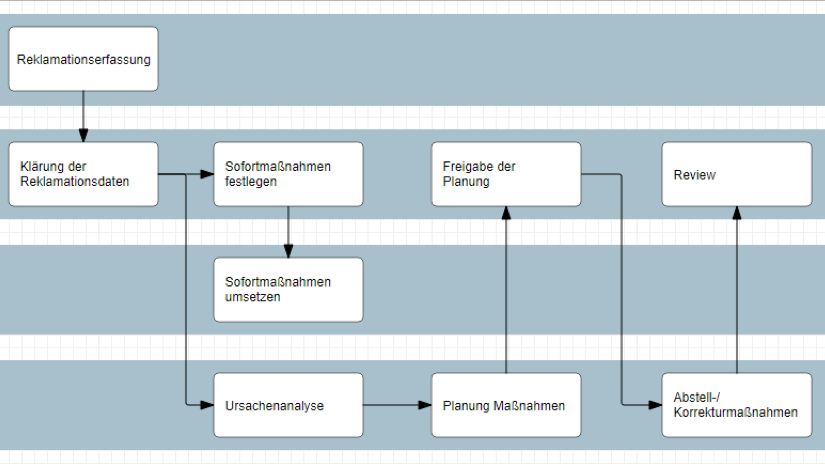
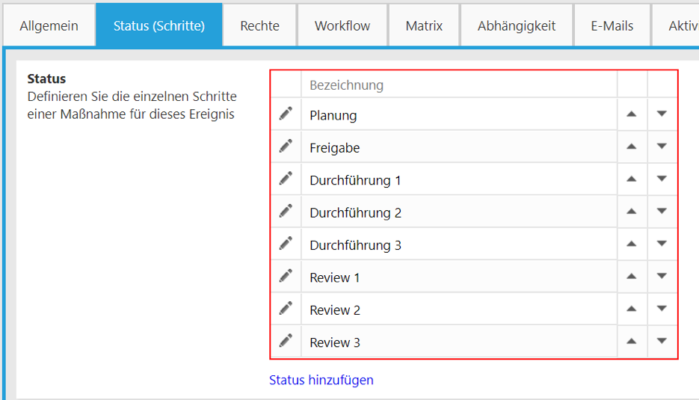
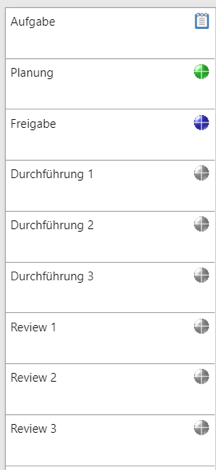
(1) In this example, a task is first planned and then released. As soon as the task has been released, three employees are to start their part of the execution, whereby the sequence of processing is not decisive. Each execution is then to be evaluated individually. The status steps were created accordingly:
(2) To enable parallel processing of the status steps, please open the newly activated menu item “Status workflow” in the navigation menu of the event template:
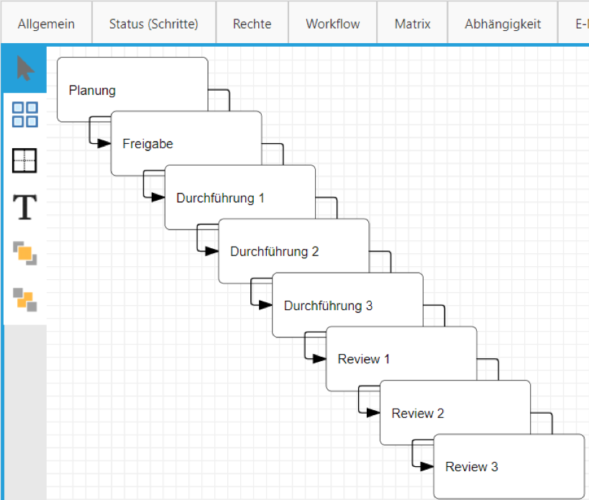
(3) An editing window then opens, listing all status steps:
(4) Various editing functions are now available on the left-hand side:
- Arrow: The arrow symbol can be used to move the status steps or adjust the proportions.
- Node: The node symbol can be used to link individual status steps with arrows to define a processing sequence.
- Rectangle: You can use the rectangle to draw in optical highlights, e.g. swimlanes according to your role and rights principle.
- Text field: You can use the text symbol to insert labels.
- Foreground: With this symbol you can bring texts or rectangles to the foreground.
- Background: With this symbol you can bring texts or rectangles to the background.
(5) Please remove previous connections first. To do this, click on the respective connection arrow and press the “Delete” key (“del”).
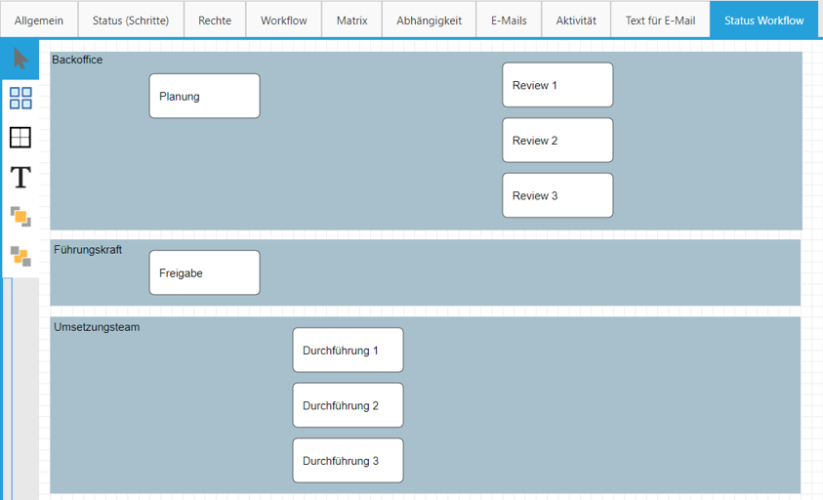
(6) Now draw your rectangles (swimlanes) and text fields and bring the process steps into the desired position:
(7) Please remove previous connections first. To do this, click on the respective connection arrow and press the “Delete” key (“del”).
(8) Now draw your rectangles (swimlanes) and text fields and bring the process steps into the desired position:
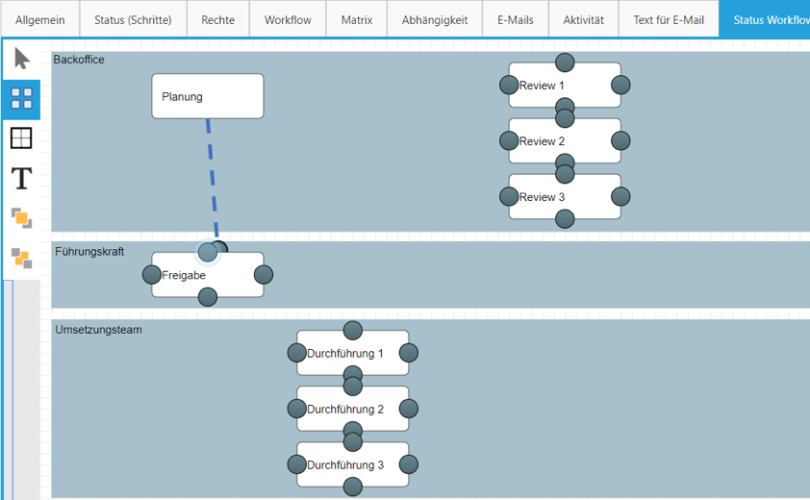
(9) Now use the “Edit node” icon and connect the process steps. Select the desired connection circuit of the rectangle, click on it and drag the arrow with pressed mouse button to the desired connection piece:
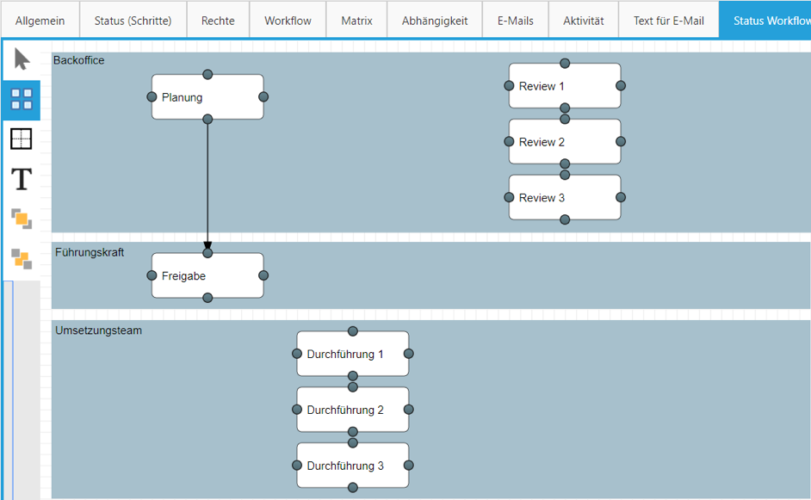
In the example, the status steps “Planning” and “Release” have now been linked together:
(10) Repeat the process for further status steps until your process model is fully connected:
(11) Once you have made all relevant settings, please end the process with “Save and close”.
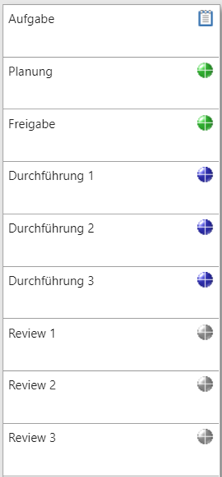
(12) You can now use the workflow traffic lights to determine which status steps are currently active or inactive. Inactive status steps are displayed with a gray traffic light symbol. In the following example, “Planning” is complete, “Release” is active, and all other steps are inactive:
(13) If now also the “Release” is completed, the three execution steps open automatically. These can now be processed in parallel, i.e. all three steps are active:
(14) In the following example, the status step “Execution 3” has now been completed. Accordingly, the status step “Review 3” is now activated, whereas the other review steps remain inactive:
3. Images in activities
(1) In the administration area under “Event templates”, any number of image fields can now be created in the “Activity” tab. To do this, open the “Activity” tab and click on the “Add field” button:
(2) After you have added, named and, if necessary, moved the corresponding image fields, please save the settings using “Save and close”. Afterwards you can upload images within activities using the corresponding buttons:
(3) Press “Upload image” and select the desired file:
(4) After you have saved the operation, the image is displayed within the activity:
4. Adjustable e-mail distribution list for mail dispatch from action(s)
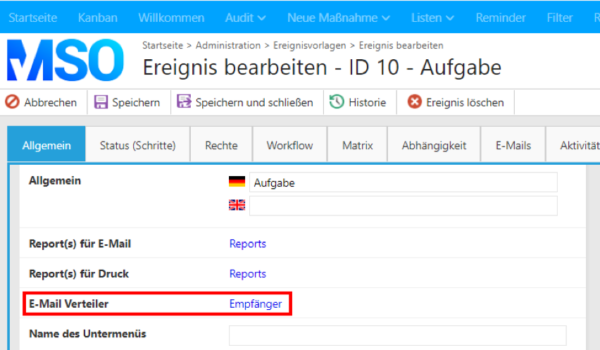
(1) With the new version, an e-mail distribution list can be defined for each event template for sending e-mails from measures. Open the desired event template and scroll to the new menu item “E-Mail distribution list”:
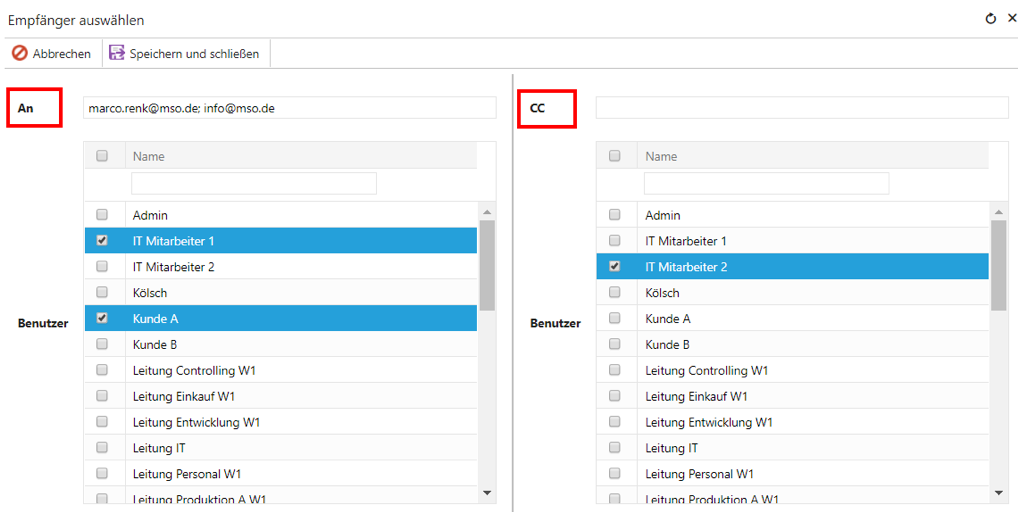
(2) Press “Recipient” to define the group of people. A pop-up will then open showing two user tables for selecting the recipient:
(3) Now differentiate between persons who receive the e-mail directly as recipients and persons who are to be added in “Cc”. Several options are available for this:
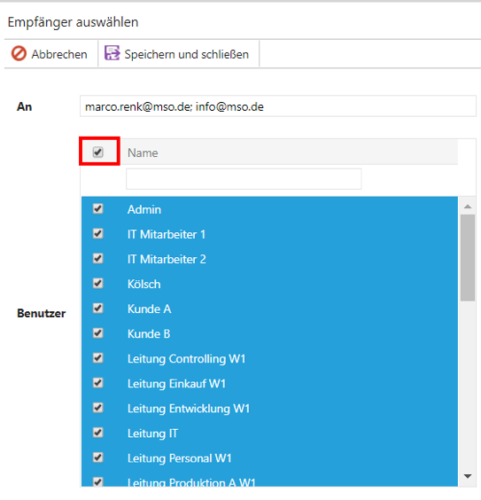
(4) Select “Name” to highlight all users as a whole:
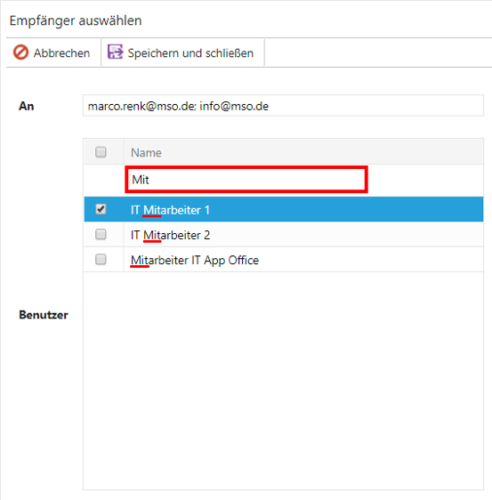
(5) Search for individual users by scrolling or using the search bar. When entering the first or last name in the search bar, the corresponding users are displayed:
(6) If you wish, you can manually add further e-mail addresses in order to add non-registered persons to the mailing list:
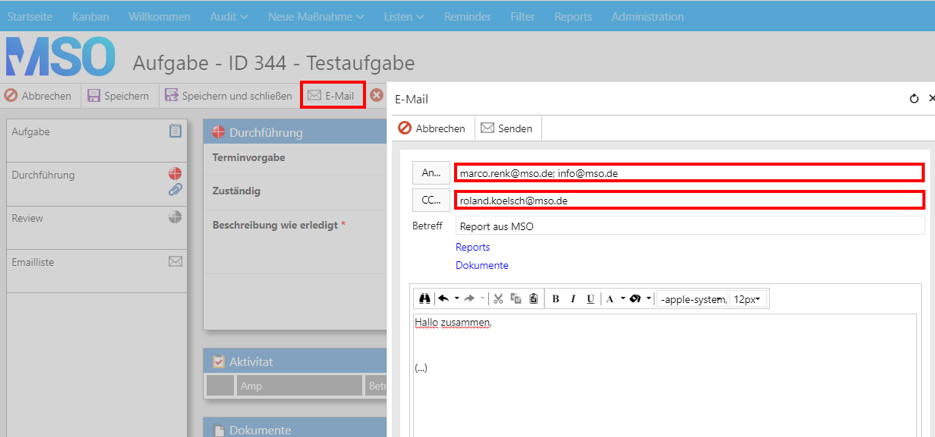
(7) As soon as the settings have been made, save your entry with “Save and close”. In future, the stored mailing list will be used for sending measures. Manual entries are still possible:
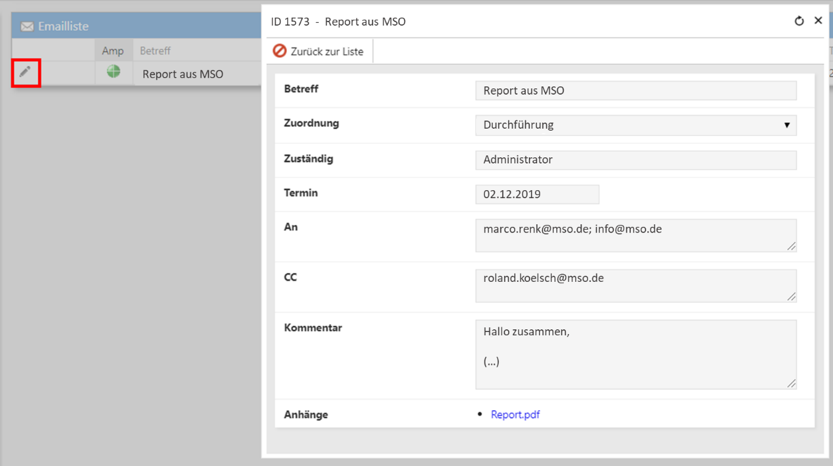
(8) Sent e-mails are then listed in the “E-mail list” tab. Click on the pencil icon to view the details:


